Friday, October 28, 2016

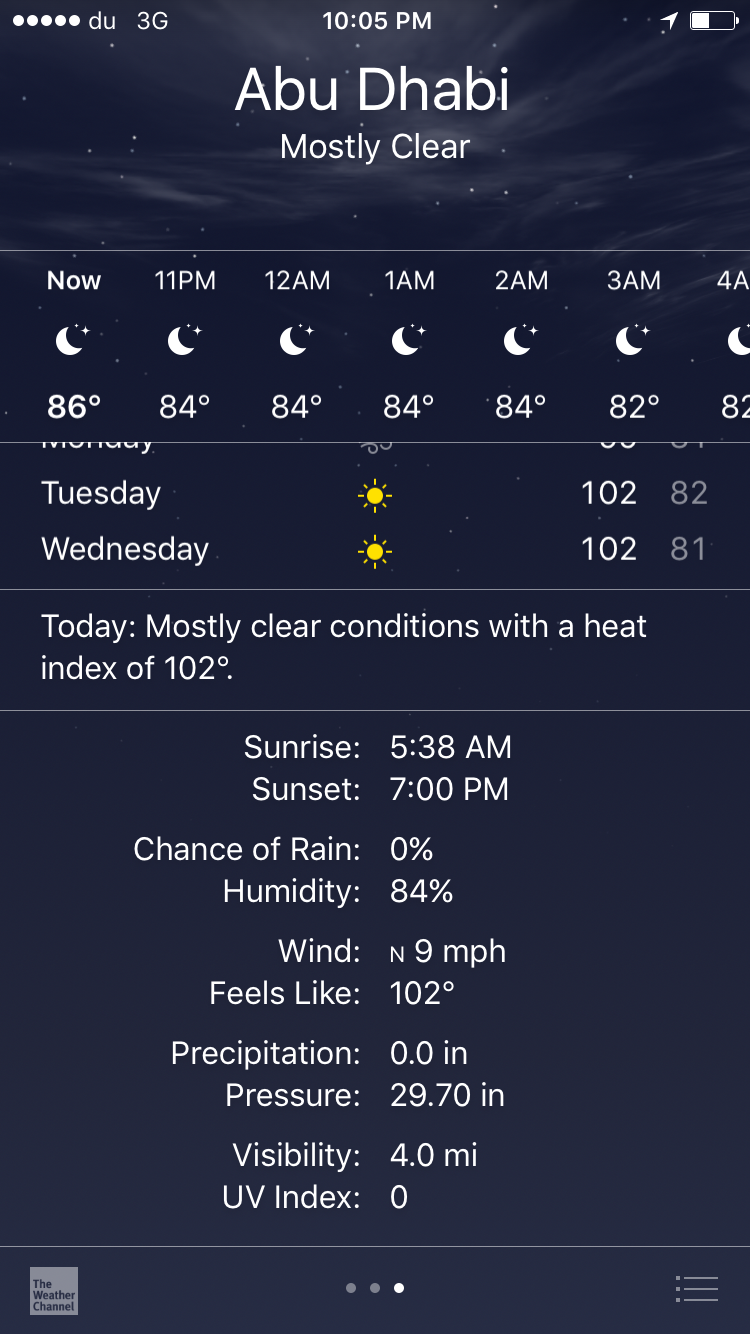
Whew!  Its been well over a year since I posted, And a busy year+ it has been!  I took a work assignment in Abu Dhabi, UAE in late July 2015 and just returned home August 10th, 2016.  My work schedule was stressful and grueling and despite taking three large boxes of my sewing supplies I only made one set of placemats and part of a table topper the entire time.  My creative juices were NOT flowing at all.  I did meet this nice camel while attending a polo match and enjoyed the "lovely" balmy feel of many  84+% humidity nights.


Enough about that, let's talk about all the fun stuff I've gotten back into since I returned!!  I took a month off work since I hadn't used any vacation in over a year.  I rested, got back into the gym, did projects around the house and also worked on a few quilting projects.

Though I didn't come home with many completed sewing projects, I did come home with 6 more cats than I went to UAE with.  Its a long story, but suffice to say, these cats have sooo much more opportunity here to have loving families than they would have if they hadn't met me and been brought to the US.  Three of the 6 have been adopted, so my clan is down to what I believe to be a manageable number of 5.  Here are some photos of the gang enjoying my quilti-ness.

Sewing is tiring work
Kittens chilling in my scraps

How many cats can fit in one basket?
Can you let me finish it first?

         You made this for me, right?

Alright, on to the quilting projects.  Since August 10th, I've completed a bunch of items including the following (in no particular order):

Paper pieced Christmas wreath
This is a paper pieced wall hanging I made as a teaching sample shop.  I got back to teaching October 15th.   I pieced and quilted this in two days!


Circle Square Quilt from the Orange Quilt Bee


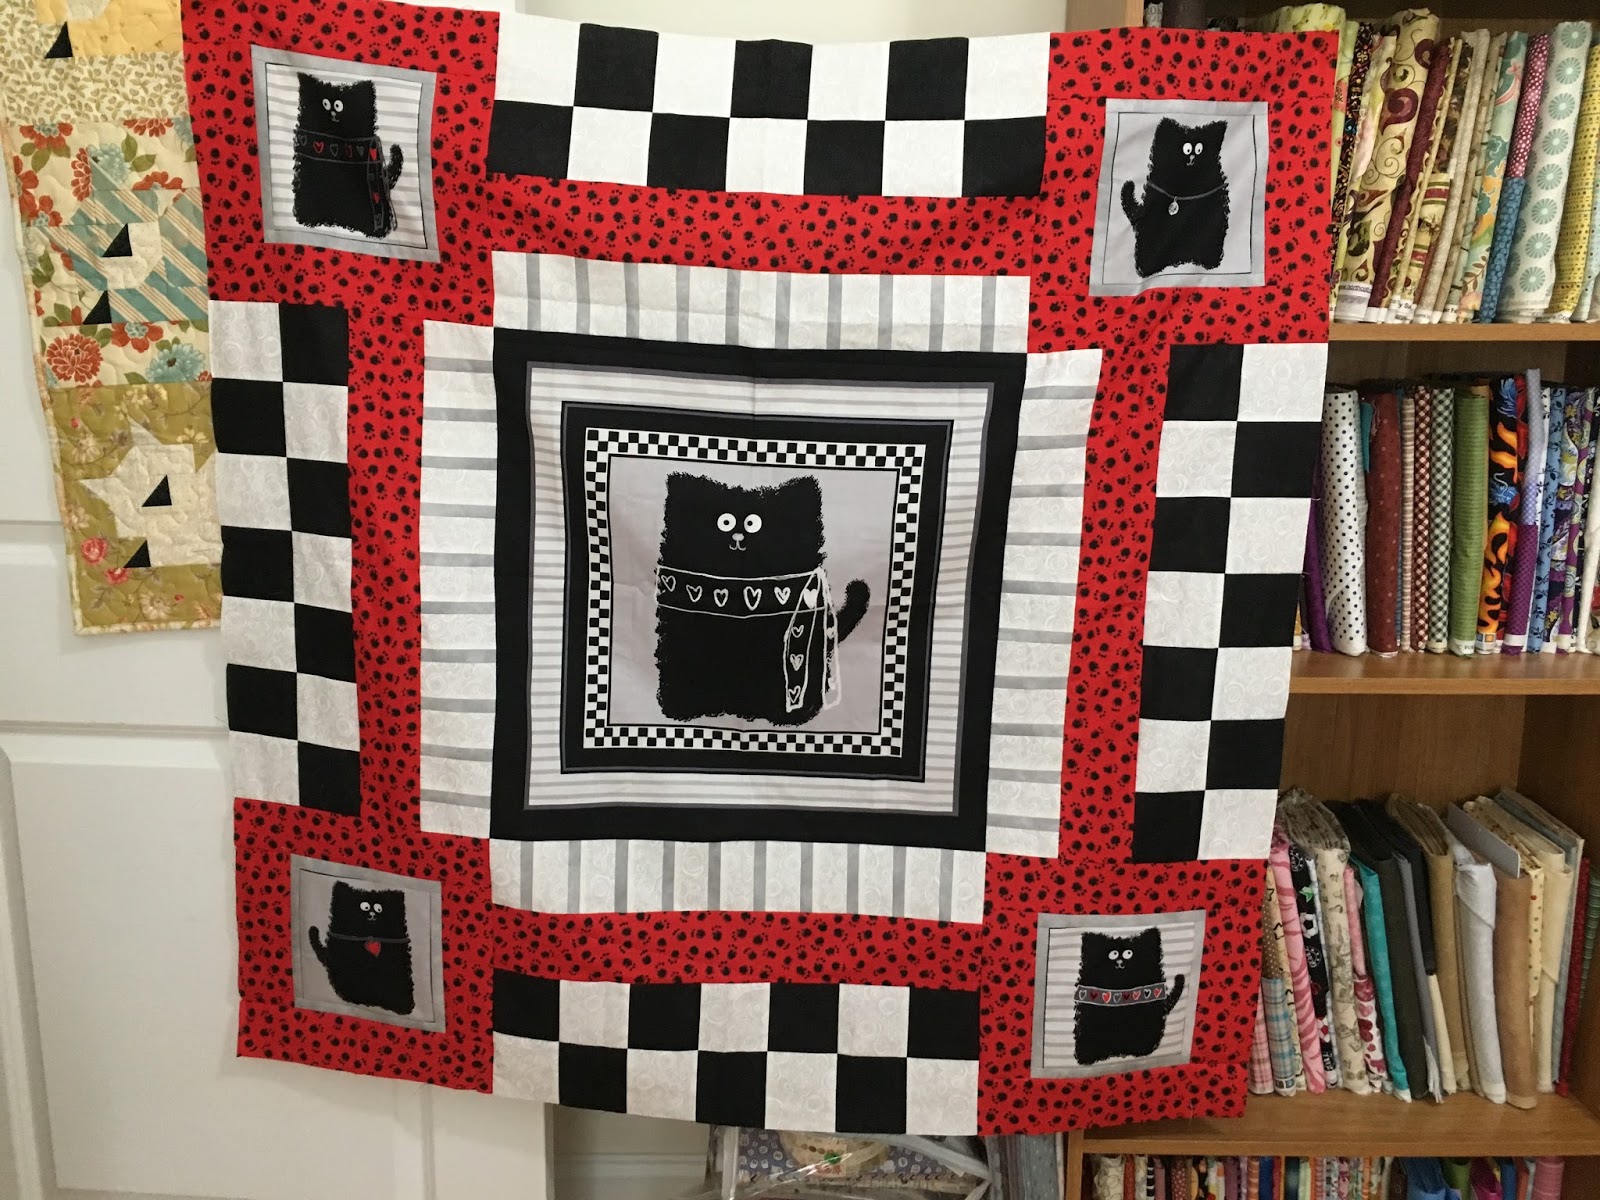
My new assignment at work has me traveling quite a bit as most of my team is based in California.  I did a little shopping at the local quilt shops while I was there for a two week trip and decided I could not spend a weekend without sewing so I went out and bought a machine along with all the basic supplies.  My hotel room was officially turned into a quilting studio and I finished two quilt tops while there.  I left the machine and all the supplies in my office in CA awaiting my return.

Smudgy Cat panel quilt
Thank You Quilt for my house sitter
I wanted to make a quilt for the friend who babysat our house for over a year.  He was a saint.  Deathly allergic to cats but due to a snafu he had to live with my cats for a month until they could fly out to be with us in Abu Dhabi.  He has his own house now and I thought this quilt would make a great thank you/housewarming gift.  Of course I washed, dried and then hid this quilt from the cats before gifting it.

I've been dabbling with pattern design and this quilt is  the second one I've made from the non-released Lickety Split Log Cabin pattern.  The pattern still has a few kinks I need to work out before publishing, but this quilt came out great and the cats of course like it.  The pattern works great if you have a jelly roll with approximately equal numbers of light and dark strips.  I'm trying to find a way to make the pattern work as nicely for a more varied group of strips.
Lickety Split Log Cabin


During my month off I decided to invest some time in getting back to my Sweet Sixteen quilting machine.  I purchased several Craftsy classes and hunkered down.  The practice sandwiches you see here are from Patsy Thompson's feather class.  I learned a TON and had a lot of fun.  The bag the sandwiches are in is another project.  Its basically three pieces of vinyl with a zipper in the middle and binding all the way around.  A great way to use up scraps and I find this bag much nicer than using zip locks.  I plan to make a lot more of these.

Hand made project back and practice quilt sandwiches
  
Freddie helps me cut out my guild mystery quilt.
 I also did something else I didn't think I would do....I joined the local quilt guild.  I'm participating in the guild's mystery quilt which is all cut out and ready for sewing.  Cutting is exhausting work as you can see.
Craftsy BoM is COMPLETE!!!
The project I'm happiest to be done with is the 2012 Craftsy Block of the Month.  I made the quilt in 2012 with both black and white backgrounds.  I waited a while to start quilting this until I got "good enough".  I had quilted about 6 blocks prior to my trip to UAE.  I was driven to finish this quilt because I have several others waiting patiently in line. I worked hard and used the remainder of the quilting as an opportunity to practice the techniques I've recently learned. I'm pretty happy with how it came out and have a lot of things I want to do differently on the black version.  I've included pictures below of each of the blocks I quilted since I got back home.  I quilted the sashing with a ribbon candy design and put feathers around the outer border.


Sunday, February 8, 2015

Arcadia Avenue BOM - Now known as Marius' Rainbow Bridge BOM - Piecing Block Two

The past 48+ hours have been some of the worst of my entire life.  Early Friday morning we had to rush my cat Marius to the ER.  He had gone septic after a lifelong struggle with GI issues and we made the agonizing decision to put him down.  There is a gaping hole in our hearts and our lives right now.  The pain is almost unbearable.  In the wake of my tragedy, I forced myself to my sewing room to distract myself from my runaway, grief stricken mind.


I decided to sew my scraps together to "make" some fabric from the remnants of this project.  Here is the result after the first two blocks.

  I had gotten my triangle segments completed and trimmed and they were ready for assembly.  It was rough.  I was going through the motions like a zombie.  What is normally so relaxing and enjoyable for me was torture.  The minutes seemed like hours.  I pushed myself on because I knew doing nothing would be even more painful for me.  I was forcing myself to use quilting to help ease my pain.  Part way through completing the block I realized that I was making a rainbow quilt as my beloved little guy was waiting for me at the Rainbow Bridge.  I broke down a little, but now this quilt is for him and his memory.  I will make it to help myself process my grief and dedicate it to his memory.  By the time I got closer to finishing the block I was feeling a little better and my mind wasn't as filled with my terrible doubts.

Here is my finished Block 2.  My first block for Marius.  My love, my little star.  I miss you so much and you'll be in my heart forever.  Please wait for your brothers, your Sir and me at the Rainbow Bridge until we can join you again.  I love you baby.

Saturday, January 24, 2015

Arcadia Avenue BOM - Piecing Block 1

...and we're off!  I finally had a day to myself where I could just focus on Block #1.

I grabbed my bag of pieces, a coffee my book and papers and I was ready to start!  Everything was going well with the first few segments....


...then disaster struck.  My first catastrophic error.  I forgot to use my add a quarter ruler and just cut right next to my plastic template and cut right through my fabric and paper :(.  Luckily, I was only 3 seams in, so I cut myself some new pieces and remade this segment to catch up with the other 11 blocks and get back on track.  Oopsie!  The good thing about doing this early on is that I'll remember it and take my time from now on, hopefully preventing it from happening again.


There were no other snafus and I completed the 12 segments.


Here are a couple pictures of my pile of scraps.  Some of the colored ones are quite large.  It seems like a shame to throw them away.  I should sew them together to make crazy fabric (you have no idea how many times I've said I'm going to do this).  Alas, should I separate out the larger ones and set them aside, or just resign to the fact that I'll never get to doing this and throw them away now?


When I sewed my first two segments together, I didn't match up each point.  I wanted to see how it would come out without using that method.  Ultimately I wasn't happy with the points on that seam, so I pinned up the rest of them as I went.


I did a combination of leaving the paper on and removing the paper.  I removed the paper in the picture below in order to press the seam open.  Once I sewed the adjacent segment, I would remove the paper from the middle segment.  I waited till the end of a quilt once to remove all the paper and will never forgive myself.  I have to remove as I go.  Removing as I go seems to work fine for me.  I starch each segment before I trim the final outline, so I haven't had any issues with stretching yet.  Leaving the paper on while sewing the individual segments together was really nice because the paper being there kept the fabric edges from catching under the machine and flipping under.


Here she is!  It took me around 8 hours to complete the sewing on this block.  Not too shabby for a full day's work.  This was by far the most time consuming block I've ever made and I kept thinking I'd be done in "just a little while" and another few hours would go by and I still wasn't done.  I do love it though, I had a blast making the block and seeing it come together.  
Obviously this quilt is going to be for me and me alone as I won't want to part with this amount of hard work any time soon.  Making a block like this is one of the reasons I always struggle when someone asks me "How long does it take to make a quilt?".


Sunday, January 18, 2015

Arcadia Avenue BOM - Cutting, Phase 2

The cutting continues...From my little pile of white scraps I was able to cut all these pieces.  Not too shabby. After all the cutting was complete my white scrap pile was greatly reduced and I didn't have to use that much yardage.


This is a picture of all my medium and light fabric for all of the blocks and the mathy-math used to cut the white fabric.  Next it was time to cut the colors!!!! Sew much fun to dig into my beautiful rainbow of fabrics!  Since I had recently installed a new blade in my rotary cutter I had been cutting 6 pieces at a time of the white fabric and decided to do the same with the rainbow.  I cut strips in the widths I needed (which was the most time consuming part) and made two stacks of six colors.  By doing this I could even cut all twelve colors at once by laying the strips next to each other! What a bonus time saver that was!  Unfortunately I didn't take a picture of that.  In the end I had a good 4" piece left from each of the colors.  I see another great rainbow quilt in the future!  I'm leaving the numbered pins in these in case I get any of the similar colors messed up while making the blocks.


The leftovers of my rainbow fabrics
 Next it was time to cut out the dark fabric.  It was getting later in the evening, but I was on a roll.  It was getting so late that my kitty Freddie just wanted to snuggle up on top of all my nicely cut and labeled pieces.  I had to keep checking underneath him to see what I had cut and make sure to keep my blade far away from him as he relaxed.  My cats each have their own baskets on one of the tables in my sewing room, but he was being so cute, I didn't move him over to his basket this time.
Freddie loves to lay on little pieces of fabric.
To cut the dark strips, I decided to use the same method of stacking six strips at a time.  I mentioned this before, but the fact that this whole quilt goes into multiples of 3, 6, 12, etc is AWESOME.  I made a cheat sheet of what I needed and cut six strips in the widths I needed.  It actually came out really great and I had very little scrap left.  I ended up using about 1.6 yards of the recommended 2 3/4, so I have quite a bit left (I see the potential for a pieced backing in my future).  I made a late push and  powered through cutting it till around 11:00 pm (on a Tuesday night, ugh), which made for a tired day at work the next day.  It was worth it though to end up with these 12 beautifully organized bags for each block.  I'm bagged and tagged and ready to start block 1!  Let the adventure continue!
12 Arcadia Avenue Block Cut, Bagged and Tagged!


Sunday, January 11, 2015

Arcadia Avenue Quilt Along

BOM & Fabric Selection 

I saw the beautiful Arcadia Avenue quilt pattern and knew I had to make it.  I love paper piecing and I love a good BOM, so why not!  I picked up the book and started going through my stash.  I really wanted to use stash fabric as much as possible.  Fate was smiling on me as it turns out.  I remembered I had a bunch of half yard cuts in a rainbow of prints that I had bought a few years ago.  I dug them out and found there were exactly 12!  I also had three grey ones from the same collection.  The pattern called for 1 3/4 yard of medium fabric though, so after about an hours worth of math I figured I had just barely enough to do it with the 1 1/2 yards I had.  Fate was on my side!  I decided to use white for the light, so all I needed now was a background and a dark.  I scoured my stash to no avail (I don't have a lot of batiks in large pieces) so to the internet I went.  I decided to check out Hancock's  clearance section.  My goal was to keep to clearance and again, luck was on my side.  I found an amazing navy star print that I thought would work great for the dark and found a beautiful sunflower print in pastels (there's always a limited selection of pastel batiks, so this was a real find).  I wasn't sure if they'd match the other fabrics I had but would be good in my stash if they didn't work and the price was right ($5.99/yd).  When I got them I couldn't have been happier.  Here is the result of my fabric expedition.  The stars truly aligned, making me even more excited to start this project.  I'm a tad nervous about the busy sunflower fabric as my background as it may take away from the beautiful blocks, but I'm going to go all in with it anyway.

Arcadia Avenue Fabrics: Medium at top, Background & Dark in Middle & Rainbow at Bottom

Let's Cut Some Fabric!

Mediums all Cut and Numbered
After numbering my rainbow prints with my Marilee's numbered pins and setting them aside it was time to cut.  I won't be cutting and piecing this BOM month by month, especially since the medium fabric was iffy.  I needed to get it cut up and make sure I had enough and that it was going to work.  The end result is shown on the right.  The math scribbled in my notepad doesn't look like much but was pretty time consuming but helped me to not waste a single piece of fabric.  You can see what I had left for scraps below.  

Medium Scraps
Now, remember, the pattern called for 1 3/4 yd and I only had 1 1/2 yd in three separate pieces and still ended up with this much left over.  Hooray for me!  Not only am I tooting my own horn for being able to add, subtract, multiply, an divide, but so far I'm also really impressed with the way the pattern book is laid out and organized.  Great job Sassafras Lane!  Now I even have some extra in case there are any catastrophic errors later.  

Next it was time to cut the light fabric.  I decided to lighten my white scrap bin since cutting doesn't need to be as accurate for paper piecing and also since I have many pieces in there already cut to the widths I would need for the project.  This would make the cutting take longer overall, but get rid of some of my scraps in the process which is always a good thing.
Light Fabric from my Scrap Bin Before Cutting

I started out with this pile and got to work sorting and pressing them.  The end result is below.  As I suspected, I have pieces in most of the widths I need and will probably be able to use up almost all of these scraps before cutting into my yardage.


Light Fabric after Pressing and Organizing


Another point to note is that I buy my white and black fabric by the bolt and ALWAYS buy the same fabric (kona solid), that way I know I've got the same fabric whether it comes from my scrap bin or off the bolt.

That's as far as I got my first night.  There will be more posts as I go along on this beautiful journey.

Monday, September 1, 2014

I'm a pattern designer?

Well, I guess I'm a pattern designer.  How does this happen you ask?  I got a jelly roll of the Kahuna fabric line to plan out a BOM for the shop I work in.  The owner asked me to bring it into the store so she could show the fabric to potential BOM participants.  Since the roll was out of the packaging, I decided to make it into a quilt top before taking it to the shop.  I scoured through my patterns only to find that I didn't have everything I needed for any of them and unfortunately this fabric line isn't released yet, so there was no way I could get any additional fabric.  This has happened to me before and its frustrating.  I know it is hard to believe, but there are just times when you don't want to (or can't) purchase additional fabric to match.

It was then that I resolved to come up with my own pattern...and I also resolved to come up with several patterns using jelly rolls that don't require background fabric.  My goal for the patterns it to be visually interesting, fun to make, and customizable depending on fabric choices.  So, here she is, my first pattern...Kwik Kahuna.  The pattern is available for sale on my Etsy site.


Saturday, April 26, 2014

My UFO Log

I saw another quilter with this type of blog post a while back and it inspired me to take some pictures of my current WIPs (Works in Progress) and post about each of them.  This is to say nothing for the hundreds (I'm not exaggerating) projects I have fabric for yet haven't started and the hundreds of patterns I have which I really want to make.  I'd better get to work!  I also finished 5 UFO projects in March, so I'm making progress.  Here goes:

Bits n' Pieces 2013 6" Strip BOM:
This BOM makes two blocks from a light, medium & dark 6" strip.  I'm a little more than half finished with the blocks.  I've had some problems with the patterns and it is frustrating at times because I've lost points and had to remake sections of the blocks and guess what size due to the sometimes poor dimensions given. Probability of finishing in 2014: 75%


Craftsy 2012 BOM (Black AND White Versions):
These quilt tops are complete...I just can't find a picture.  I've been waiting for my quilting skills to improve before tackling a custom quilt job on these.  The time is drawing near! These quilts use the "Good Fortune" fabric collection from Moda.  I wasn't sure whether to use a black or white background, so I decided to make one of each!  I like how both of them turned out.  This was my first time making a quilt with a black background.  Probability of finishing in 2014: 70%
 Pile O'Fabric 2013 BOM:
I really enjoyed this BOM until I got totally stuck on the EPP blocks.  I haven't been able to recover.  This is my first ever quilt-as-you-go project.  I also went outside the box and chose this very modern/manly blue/green color palette.  This is my first quilt using solids.  Probability of finishing in 2014: 15%
  
Buggy Barn Quilt:
I LOVE Buggy Barn and their "crazy" patterns.  I had bought the Lilac Parade fabric collection and the book and when I saw that one of my local quilt shops was offering a class I signed up even though I was super busy and overloaded w/ projects at the time.  I cut everything and finished one whole block in the class and that's as far as I've gotten.  Probability of finishing in 2014: Virtually Zero %

Patriotic Quilt:
I started this on or maybe even just after the 4th of July in 2013.  I was feeling very patriotic at the time.  This is my first patriotic quilt.  The quilt is a sampler and is supposed to finish at a double size. I decided to make the quilt half-size so that I could use it as a wall hanging.  I was feeling patriotic, but not patriotic enough to have a large red, white & blue quilt.  The blocks have been fun to make so far, but man, they are small.

Inner City EPP Wall Hanging:
This is my first full EPP project.  I wanted something small as this is quite tedious.  I'm realizing EPP is not my favorite technique...b/c I procrastinate on it terribly.  I don't even know when I started this, but it seems that it is going to take me many more years to finish.  Probability of finishing in 2014: Virtually Zero %

Cat Embroidery:
I've said many times that embroider/red work is just something I'm not interested in taking on.  I bought this pattern for my friend to make for me.  Then I kept watching everyone at the local quilt shop work on their own embroidery projects and decided I should try it.  It is pretty fun and relaxing.  I definitely like it more than EPP.  I like to work on this from time to time though, not plug away at it for days and days, so this project will likely take me a while to finish.  I plan to make all three of these into a small wall hanging.  Probability of finishing in 2014: 100%

Snowman Table Runner: No photo..no rush to finish b/c Christmas season is far away!  Probability of finishing in 2014: 100%

Modern Traditional Web Quilt Challenge Contest Mini Quilt:
I started this project this month when I saw the contest online.  Great, just what I need, another rush project to stick in with all these other UFOs.  The quilt is 20" square and I need to finish it and submit pictures by 4/30.  I'm doing micro quilting on it and will probably have about 15 hours invested just into the quilting on this baby. Probability of finishing in 2014: 100%